Starting a website has never been easier, which opens up the opportunity for you tomake passive income. Whether you are building a blog, a website, or selling online using your website, Weebly has you covered. This post has a complete guide for you so can easily start a website on Weebly.
If you want:
- Start a website on Weebly
- Start blogging using Weebly
- Start selling online with Weebly
- Start promoting your offerings online with Weebly
Then you’re at the right page.
This post will help you :
- Choose a website niche
- Find & Select a Domain name
- Setup a website on Weebly
- Find the right theme
- Configure the right modules
- Help in publishing your 1st page
- Get traffic on your new website
- Website Tools Suggestion
- Start Making Money from your website
- FAQs on starting your website on Weebly
[toc]
Why Choose Weebly for a New Website?
![]() Weebly is a website builder that an optimized environment for website beginners. In this article I’ll tell more about this website builder and how intuitive it is to use for newbies.
Weebly is a website builder that an optimized environment for website beginners. In this article I’ll tell more about this website builder and how intuitive it is to use for newbies.
Weebly is one of the best budget website builders with great features, good performance, powerful security tools and extra add-ons to get the website exactly like you want it. This makes Weebly the right website builder for your new website, consisting of these top 8 differentiators that people focus on when choosing Weebly as their website builder:
- Up to 10 websites per account
- Free Shopping module with unlimited items
- Competitive website builder pricing
- Optimized for SEO
- 1.6 million websites already registered
- 24/7 Customer Support
- Free SSL Certificate to improve security and rankings on Google
- 30 Days Money Back Guarantee
Weebly Full Features and Plans
Weebly is a leading website builder where you are sure to get a good experience, support and performance like page speed and server uptime. Already many entrepreneurs are using Weebly for their website, particularly in the USA, Canada and India.
Now is the right time for you to start a website with Weebly using this simple tutorial.
Now Let’s start this process… ➡
Best of Luck
How to Start a Website on Weebly – 8 Simple Steps
Start a Website on Weebly using below 8 step by step complete guide.
1. Choose a Type of Website
The first things that you have to do at the beginning of starting anything new — whether it is a business or a website — you have to find out what type of website you want to create.
What is the purpose of the website? Do you want to sell on your website? Do you need a blog on your website? All these things have to be taken into account.
On Weebly, there are two main categories to choose the purpose of your website – is your website with or without an online store?
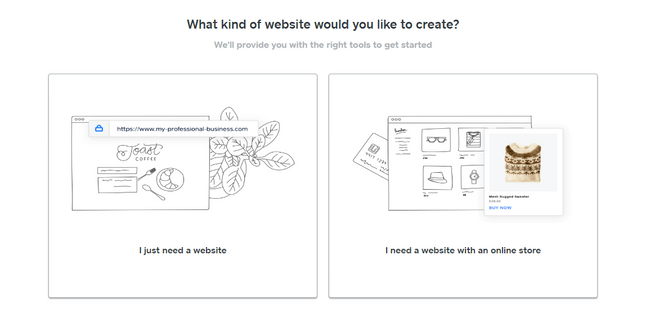
It is tempting to “play safe” and just go with a website with an online store to have it, but before jumping to conclusions, remember that you should only choose this option if you are truly planning on selling online. If not, then an online store only slows down the website and in some case hurts on your Google rankings because there is a store installed not being used. For a website without an online store, there are 3 general types of websites:
- Want to make money online – Blogging Tips, Travel, Fashion, Beauty and Health Blog
- Want to share your experience – Now it is your experience/niche.
- Start a blog for your business – Write about the services and news about your business.
If you still cannot decide on the purpose of your website, don’t worry. When you start working on your website and watch others that you compete with, you will find your purpose eventually. And remember, you can upgrade to a paid plan with any feature at any time, but we’ll help you with that later – for now, just enjoy building your website!
Moving on from purpose to finish creating our site, we need to select a theme.
2. Select a theme
Weebly has around 40 themes that can be customised, all of which are totally free! There are plenty of categories to choose from: ‘Business,’ ‘Portfolio’, ‘Personal’, ‘Blog’, and more. From your choice, Weebly then suggests some more specific themes that fits well with the purpose of your website.
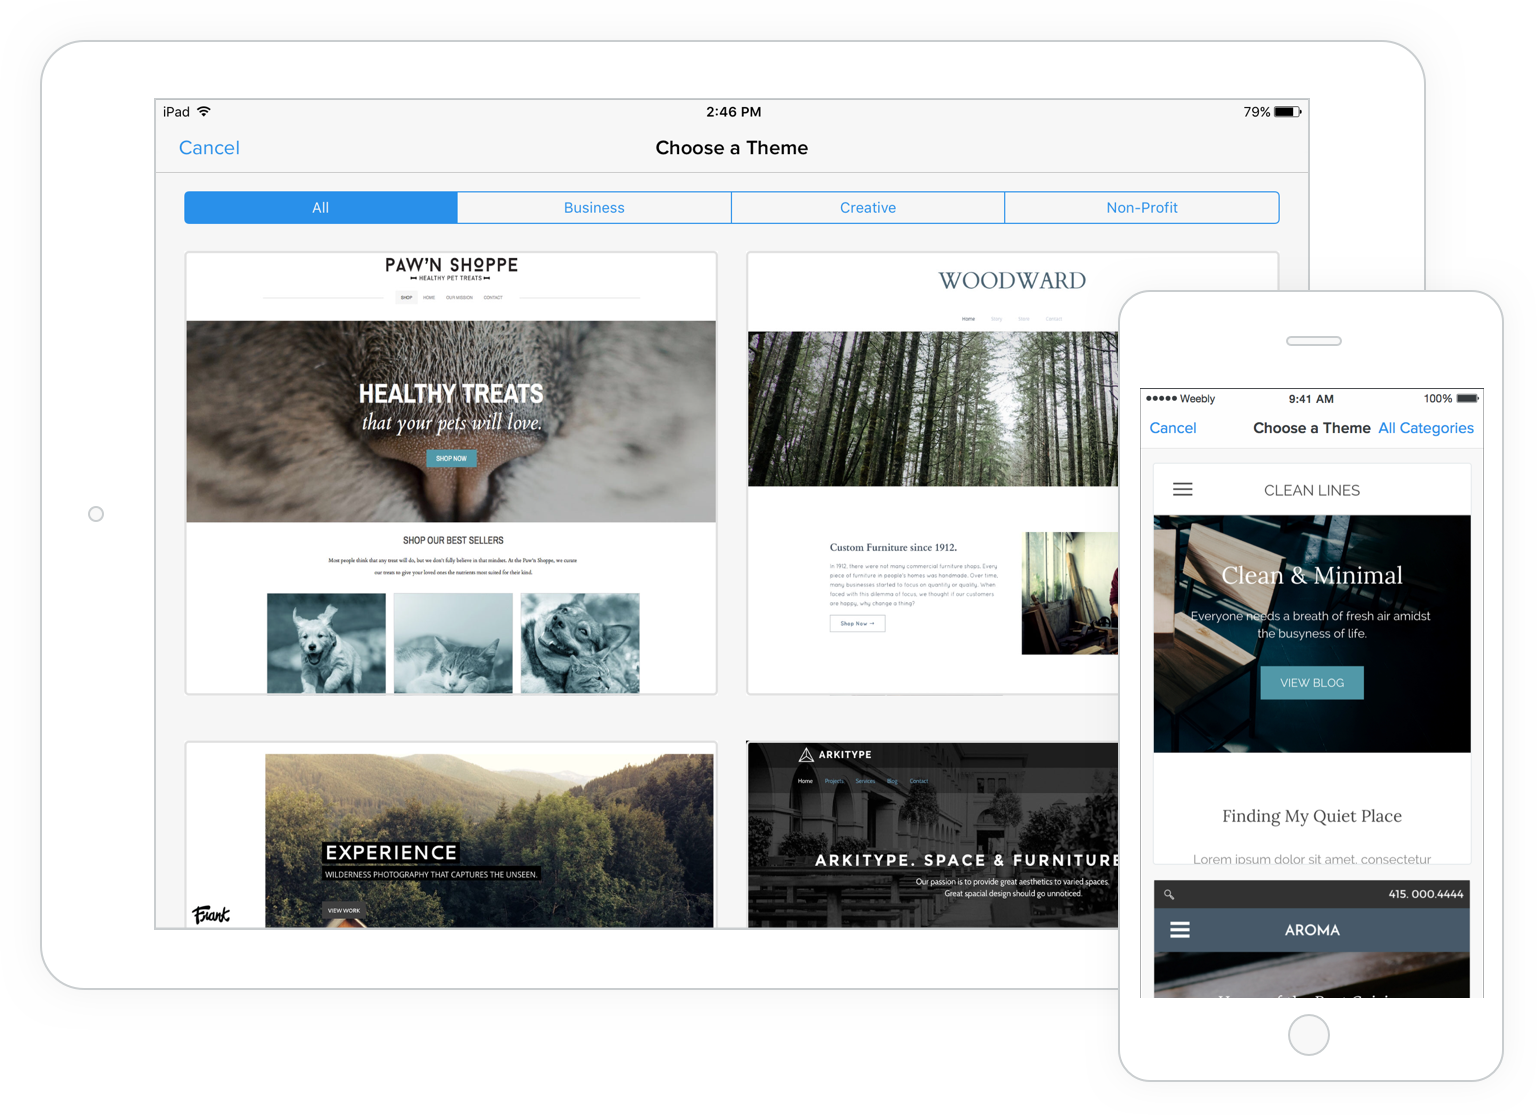
The Weebly themes are modern, crisp, and all mobile responsive. This means they look awesome on any screen – desktop, laptop, tablet or mobile. And, unlike Wix, you can change templates at any time, so you’re not restricted by your choice when you first start your new website. This will save multiple headaches as your website grows!
Can’t decide? You can preview each theme by clicking the thumbnail to see how it looks on a full screen. Then, if you like it, hit ‘Start Editing’ in the top right. Make sure you click around for your favorite theme.
Weebly also offers business-specific options like delicious restaurant templates, fresh cleaning service designs, strong-looking personal training themes – almost anything you can imagine. These options save you even more time – you just need to edit the text boxes and images and you’re ready to take over the world of online! 
You only have one chance to make a good first impression, and the theme is what your visitors see first. So make sure that it counts and it says what you want. Do you want a clear CTA (Call To Action) button, like ‘Book Now’? Or would a series of images work better? Whichever you choose, there’s a Weebly theme that suits your needs, but you need to keep it in mind so you don’t waste valuable time flipping between a number of themes.
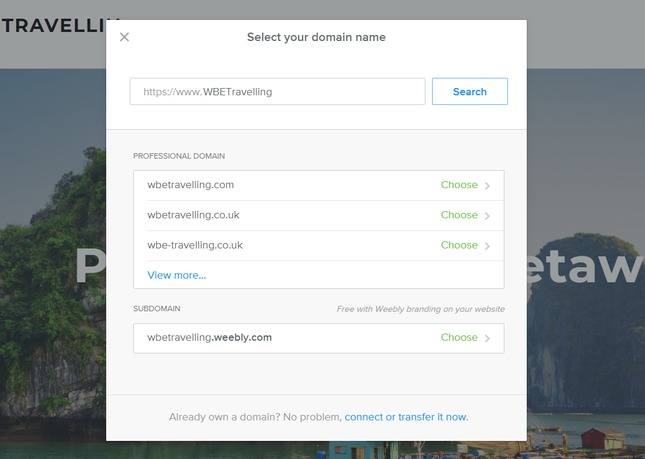
3. Choose domain
Like every brand name, when it comes to your online identity you also have to decide on your website name.
A name for your website is more than just a brand name. Whatever name you decide to go with indicates to your visitors what you represent and what you are all about. What the purpose of your website is. For example:
- SmartPassiveIncome.com – Show how to make money using passive income streams
- GoBloggingTips.com – Talks about blogging tips
- Backlinko.com – Talks about building backlinks
Alternatively, you can also go with your own name like the below examples:
- neilpatel.com
- bloomberg.com
- melyssagriffin.com
Remember, when it comes to websites, always try to start your website with an attractive TLD — Top Level Domain — like .com, .net and .org domain names.
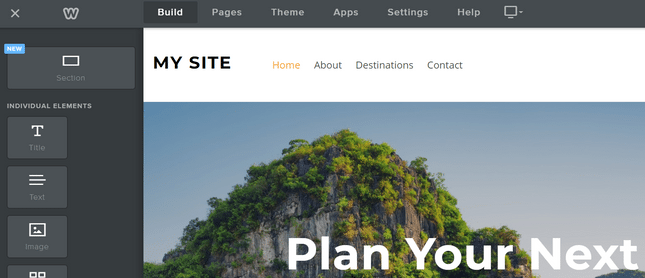
4. Design your new Weebly website!
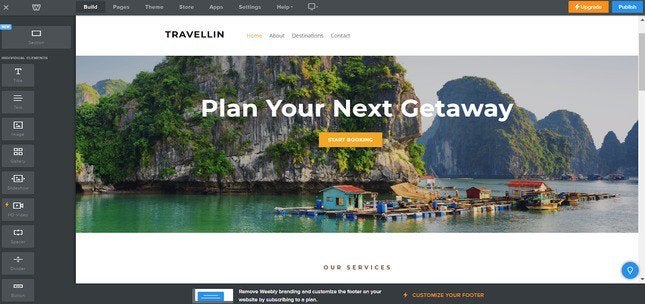
After choosing your domain name, you’re redirected to the Weebly website builder. This is where you’ll let your creative mind loose! While we will run through the menus and features one by one, here’s what it looks like at first glance:
4.1. Adding elements
The first thing you want to do typically when creating your website is to start adding elements. Using the ‘Element Menu’, in the left-side panel, simply drag and drop your chosen media icon anywhere on the page. You can throw text, videos, buttons, and more anywhere you desire. Check out the Element Bar below for just some of the elements you can choose from:
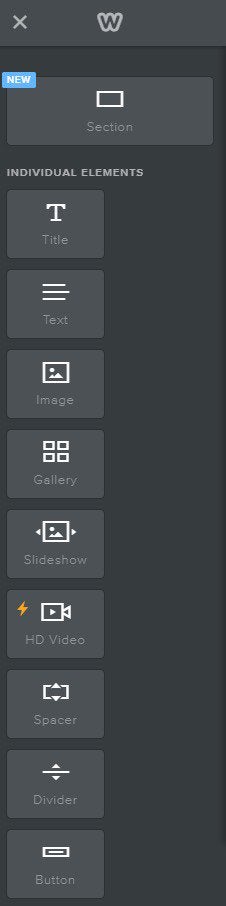
Any element with the lightning bolt symbol next to it can’t be used on the free plan – you’ll need to upgrade to use these features to a Personal, Professional or Performance plan. However, everything else is free for you to play around with!
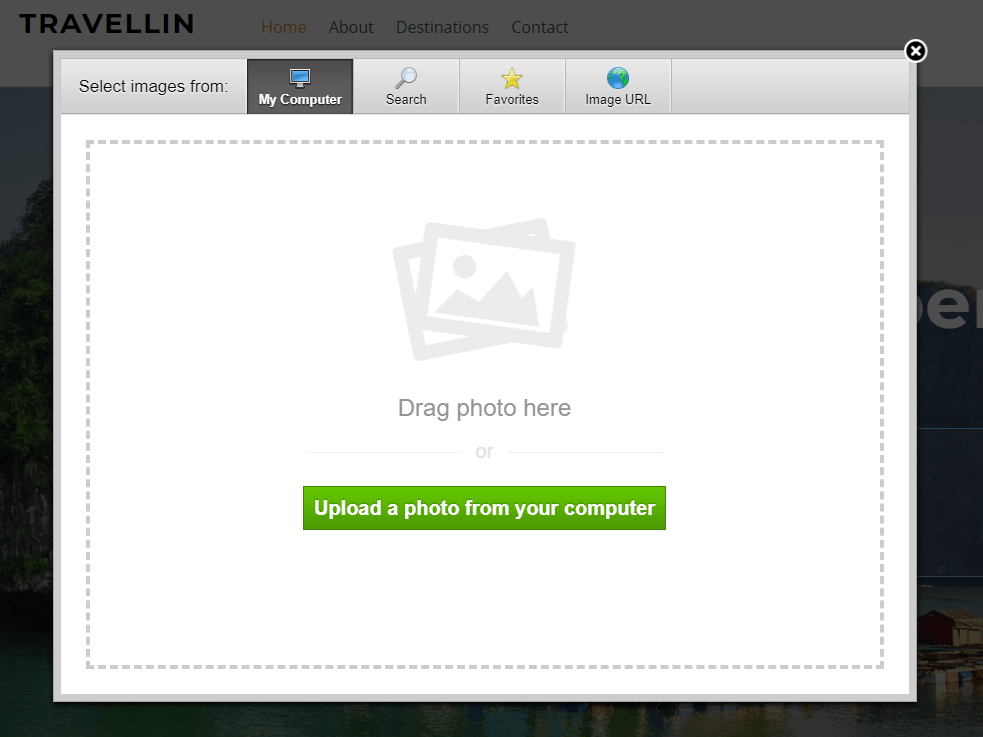
Let’s say you want to add an image. Drag the icon where you want, then click ‘Upload Image’. A popup will then give you some options: you can upload from your computer, or press ‘Search’ and find a free Weebly image in their own dedicated directory.
4.2. Editing text boxes
Weebly is a ‘What You See Is What You Get’ (WYSIWYG) website builder. This means you can click and edit, as well as drag and drop media, without needing to know any code. So to update the text, simply click the box and type:

4.3. Editing the background
You can customize your theme even more by changing the background. Simply click the background image and select ‘Edit Background’. From there you can change the image, scrolling effect, and page alignments.
4.4. Editing Menu Navigation
To edit the menu navigation on your Weebly website, simply click ‘Pages’ on the top Navigation Menu. Adding elements is the same process for each page – just drag, drop, and click your way to a beautiful website.
4.5. Adding New Pages
It’s easy to add new pages to your website. Simply go to the Pages tab in your menu and click the plus icon in the left-hand sidebar. A drop-down menu will appear with different types of pages.

Select the type of page you want to create – a blog page, for example – and give it a name. As you do this, Weebly automatically loads the page for you, with pre-filled images and content for you to customize as you see fit.
Remember to click ‘Done’ to save your new page’s settings. Once you’ve clicked ‘Done’, return to the ‘Build’ menu tab to edit the page just like you would normally!
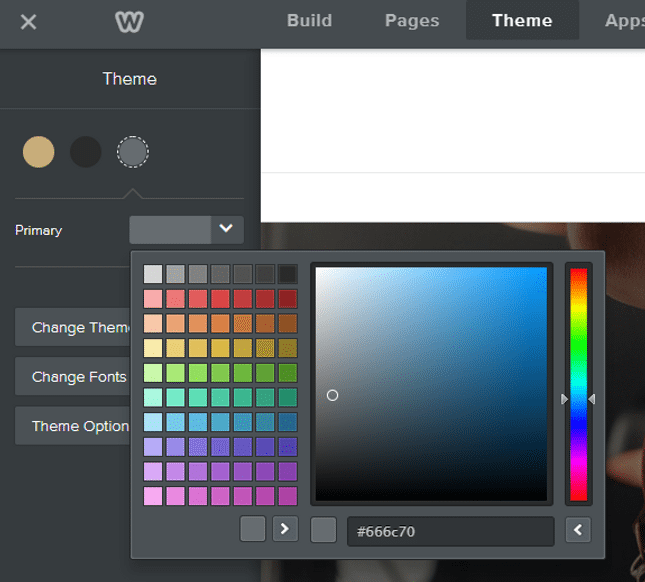
4.6. Changing the Color Scheme
You can change the color theme of your page in the Theme section of your dashboard. For some themes you simply have the options of light or dark, while others give you actual colors to switch between.
This is fairly basic and you won’t see massive changes to your theme, but you can add a custom color to the range of choices if you want to using the slider or HEX codes:
4.7. Adding New Layouts
To really personalize your website, you’ll want to add new sections to the pages you’re editing. Apart from adding new elements, there’s also the option to add new sections.
This element sits at the top of the left-hand sidebar above all the other elements – simply drag it to where you want it on the page and let go.
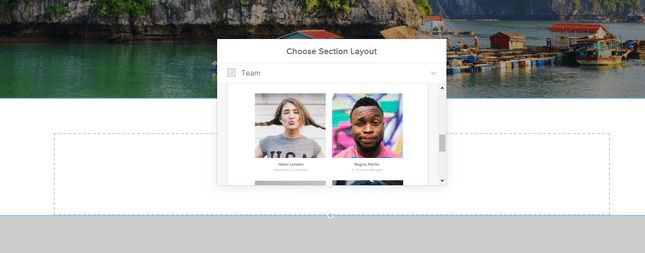
It’ll give you a list of options: Gallery, Contact, Menu, Featured, and Team. Select the one you want to add.
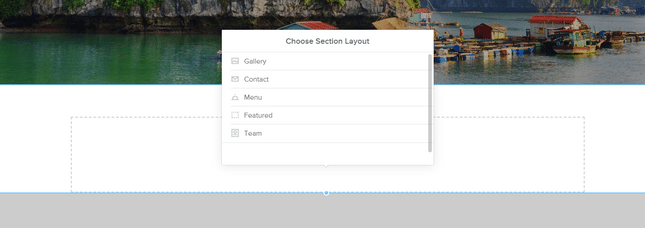
Weebly then gives you a list of different layouts to choose from, so you can pick the one you like the best. Click on the layout you want, and it’ll appear on your page. Click save in the popup box, and get editing!
4.8. Deleting Sections
We all make mistakes, we all change our minds, and we all learn differently – we’re only human after all! That’s why it’s important to know how to delete elements on your site, as well as adding them.
You might want to try out a gallery on your homepage, but then decide it doesn’t work. You’re not stuck with it forever – simply click on the element, and look for the small blue cross that appears in the top right corner of the editing box.
Click on that cross, the box will turn red, and you’ll have the option to delete that element.
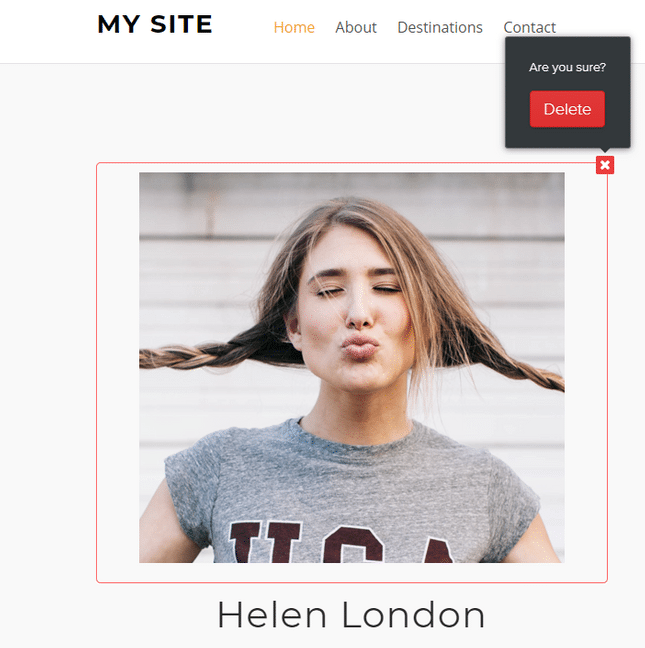
This is how to delete small elements like galleries, text boxes, images, buttons, and more.
If you want to delete a larger section such as a background, simply click on the area you want to remove. You’ll see a few options: Edit, Move, and Delete. Click the Delete button and you’ll see a popup asking you if you’re sure you want to delete. At this point you can either cancel or confirm – if you click ‘Delete’ then that section and everything inside it will be deleted forever.

5. Add apps to your website
Additionally in the Navigation Bar is ‘Apps’. As you might have guessed, this takes you to the Weebly App Center. Whatever your website is about, Weebly has an application to help reach your goal. Not only does Weebly categorize apps for sales, traffic, social and Weebly-specific, but they recommend apps specifically for your website. It’s like having your own personal website builder at your right hand.
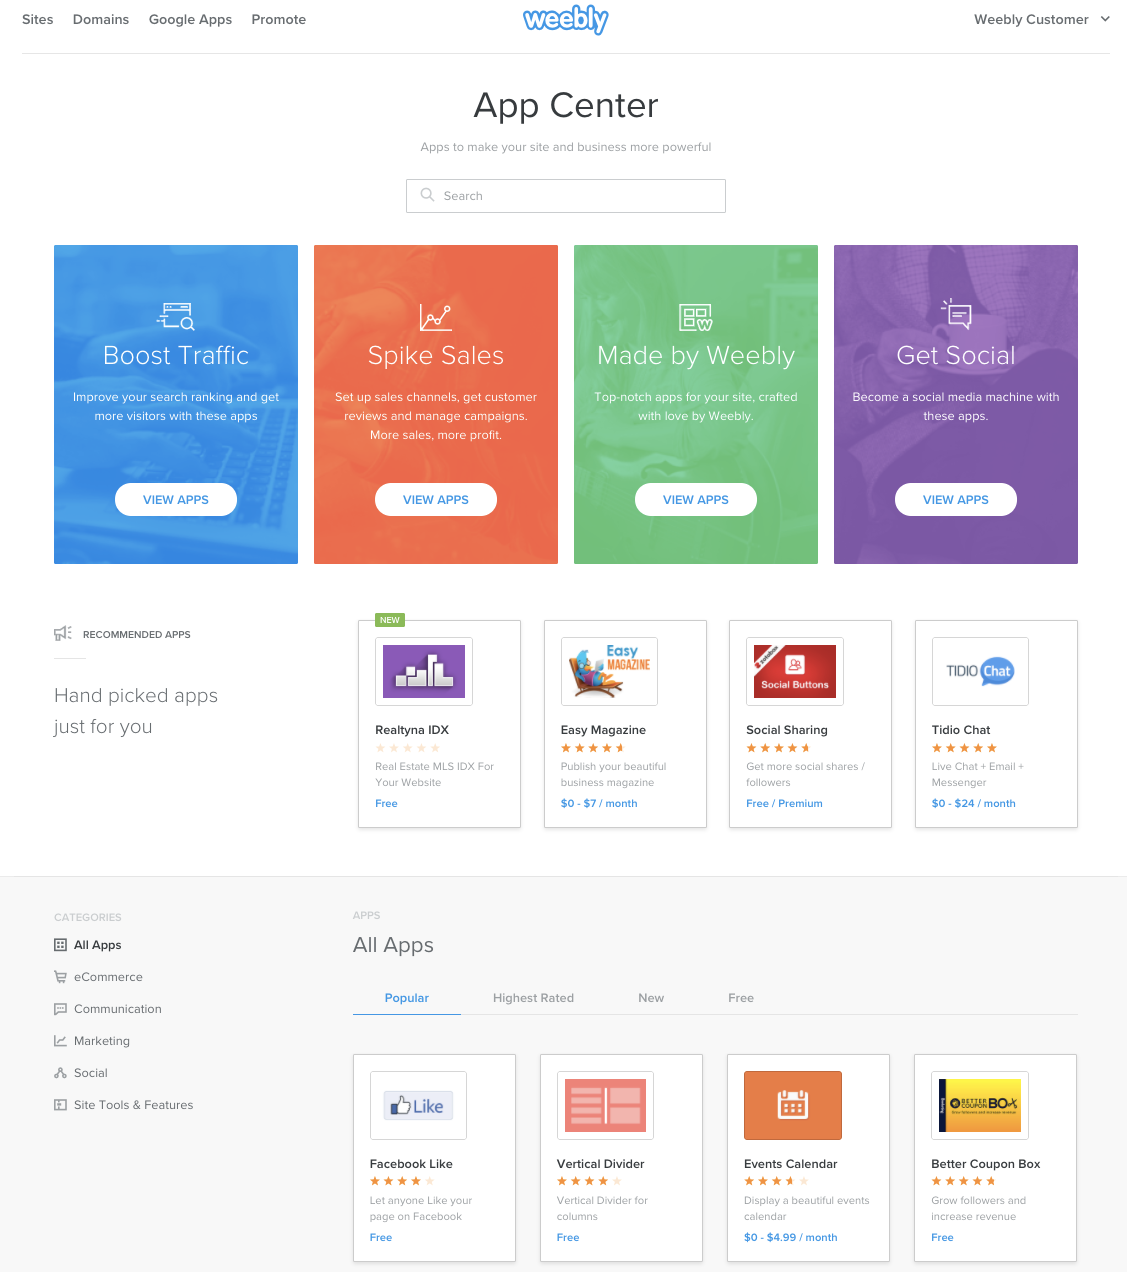
Weebly has an impressive amount of apps – over 300 apps. More than 50 are free, and there are always new apps being added while existing apps receive continuous updates, so you won’t struggle for choice.
If you feel overwhelmed, you can sort by ‘Popular’, ‘Highest Rated’, ‘New’, and ‘Free’. Or just search for whichever type of application you want to install, whether it’s an FAQ section, countdown timer, or social feed. You can even categorize them on the left hand side.
Also, before making any purchases, you can check the user ratings on each thumbnail. If you cannot find one that you like, scroll down to the very bottom and submit a new app idea, or even develop your own if you are able to code yourself.
To install apps, click on the an app that you want on your website and then click the ‘Add’ button. A popup box will appear like below, where you need to click ‘Connect’ to install the app and agree to any terms.
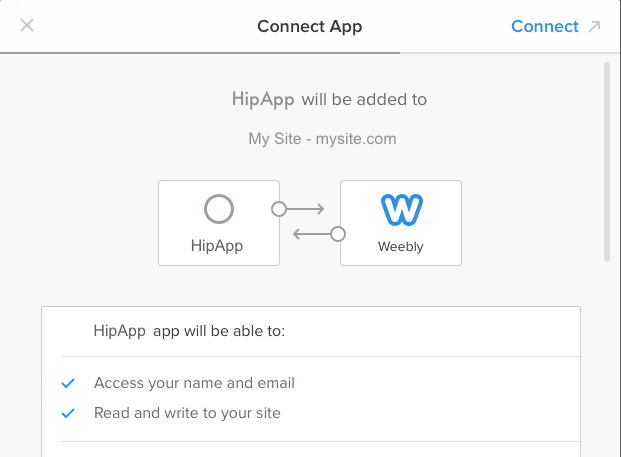
Once the app is installed, you’ll be taken back to your website. The app will automatically appear at the bottom of the left-hand sidebar, under the ‘Installed Apps’ section.
Once your app is installed, drag it onto your page as you would do with any other element.
6. Add online store to your website
Don’t want a store? You can skip this step! If you do want an online store though, carry on…
Back at Step 1, you had the choice of setting up an online store. If you chose not to but changed your mind, don’t worry – you can easily set one up now. Close your editor for now and go to your Account Dashboard. Open up the menu in the top left corner, and click ‘Store.’ This takes you to the easy-to-use setup page.
The options follow a natural order for setting up an online store. So, starting from the top, setting up a Weebly online store looks like this:
- Add Store Information
- Add a Product
- Start Accepting Payments
- Set up Shipping
- Set up Taxes
- Publish and Start Accepting Orders
However, you’ll need to upgrade to the Professional plan to access premium tools like a shipping calculator, or the Performance plan to send abandoned cart emails and access advanced analytics. Check out the table below to see what sales features you get with each Weebly plan…

Remember that the Professional plan also removes adverts, and unlocks a free domain, unlimited storage, and password protected pages. As you can see, the Performance plan is the most robust plan for selling online.
Worried about picking the wrong plan? Well, fear not – you can change plans throughout by clicking the strategically placed yellow ‘Upgrade’ prompts.
7. Choose pricing plan
Up until now we’ve assumed you’re happily building on the free plan. However, as we’ve seen there are cases where you might want to upgrade – for example, to unlock advanced features or start selling online!
Let’s take a quick look at Weebly’s prices and how you can upgrade if you want to.
| Weebly Plans & Features | Free | Personal | Professional | Performance |
| Price | $0/mo | $6/mo | $12/mo | $26/mo |
| Shopping Cart? | YES | YES | YES | YES |
| Custom domain? | NO | YES | YES | YES |
| Free SSL? | YES | YES | YES | YES |
| Weebly ads? | YES | YES | NO | NO |
| Web Space | Restricted | Restricted | Unlimited | Unlimited |
| Best For | Newbies | Bloggers and influencers | Entrepreneurs | Businesses |
| GET PLAN | GET PLAN | GET PLAN | GET PLAN |
To elaborate on who the paid plans are best for:
- Personal: Best for hobby sites and personal blogs, personal portfolios or similar, the Personal plan is for having fun and playing around. The only difference between this and the free plan is that you can connect a custom domain – it won’t remove adverts from your site, so we don’t recommend it for professional websites.
- Professional: Best for business sites, professional portfolios, or any website you want taken seriously online. This is the cheapest plan to remove adverts – you also get a free domain, unlimited storage, password protection, and a shipping calculator. This is the plan we recommend to most Weebly users.
- Performance: Best for online stores and large businesses, especially if you’re aiming for high growth. With the Performance plan you unlock premium selling features such as abandoned cart emails and shipping discounts, as well as advanced ecommerce analytics.
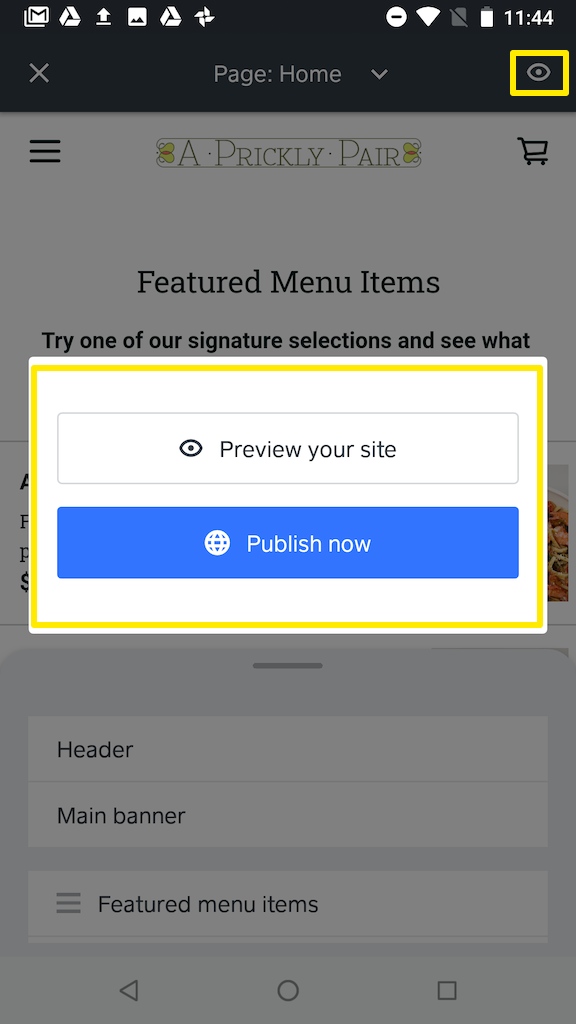
8. Launch your Weebly website
If you’re happy with what you’ve created, you can now publish. Congratulations!
If you’re not completely happy, don’t worry – you can revisit the Weebly website editor at any time to make some changes after you publish.
To publish your site, hit the blue ‘Publish’ button in the top right corner. You will then receive a popup telling you it’s published, and how to integrate a ‘Pro Tip’. Weebly really wants your site to succeed.
You’ve now published your Weebly website. Hurray! As mentioned, it’s easy to update and edit your site at any time. You can also upgrade your plan if you want to. Just head back to the previous Step 7 to view the plans and their benefits.
If you publish your site, but then change your mind, you can head to your Settings and scroll down to the very bottom. There, you’ll find an option to unpublish your site with a single click. Easy!
Comments are closed.