Have you ever looked at other businesses and thought “I want a website like that for my own”? Well, with Squarespace you can. Squarespace makes building a website look like a walk in a park. It’s simple, fast, and fun. But most importantly, Squarespace enables you to earn passive income in an easy way. So, read on and learn how to start a website with Squarespace, so you too can unleash the full potential of your business.
[toc]
So, if you want to:
- Promote your business online with Squarespace
- Start your own blog using Squarespace
- Sell your goods and services online with Squarespace
- Start promoting your offerings online with Squarespace
Then this is the article for you.
This post will help you:
- Find the right online approach for your business
- Promote your brand with a professional digital platform
- Build your new website with the Squarespace website builder
- Choose the right template for your Squarespace website
- Publish and manage your new Squarespace website
- Attract traffic and grow your business online
- Find the perfect third-party tools for your platform
- Start Making Money from your new website
- Answer FAQs on how to start a website with Squarespace
How Squarespace fits in your digital solution?
![]() Squarespace is one of the most design-oriented website builders on the market. While other website builders focus on simplicity and functionality, the Squarespace website builder focuses on elegance and as well as simplicity and excellent user experience. Whether you are building a promotional website, an eCommerce platform, or a personal portfolio, Squarespace has just the right template for you.
Squarespace is one of the most design-oriented website builders on the market. While other website builders focus on simplicity and functionality, the Squarespace website builder focuses on elegance and as well as simplicity and excellent user experience. Whether you are building a promotional website, an eCommerce platform, or a personal portfolio, Squarespace has just the right template for you.
In this article, we will provide a step-by-step guide on how to start a website with Squarespace, along with all the gimmicks and cool tools the Squarespace has to offer. However, unlike web builders like Webflow or Wix, Squarespace is not free. But, it comes with a 14-day trial which is more than enough for it to capture your heart. Aside from this, the Squarespace website builder has several other key features:
- Simple, modern, and user-friendly website builder;
- The Squarespace website builder comes with award-winning templates;
- Inbuilt marketing and promotion tools;
- Perfect for blogging as well as eCommerce;
- SEO tools, report, and analytics tools;
- A professional logo maker;
- Enables on-the-go website builder through their iOS and Android mobile apps;
- 24/7 chat and email support.
SEE THE SQUARESPACE LIST OF FEATURE AND PLANS
Squarespace powers 1.5% of the world’s websites, making it one of the most preferred website builders in the world. And it’s easy to see why. The Squarespace website builder is easy to use, their templates are beautiful and highly functional.
So follow this tutorial, start a website with Squarespace and join over one million happy entrepreneurs.
Ready?
Set!
Go!
Start a website with Squarespace in 9 simple steps
Break the chains of mainstream, dull sites, and start an outstanding website with Squarespace.
1. Getting started with Squarespace
Much like other website builders, Squarespace offers several options for login. For example, you can create a user or log in directly with your Google Account. However, unlike many of these website builders, Squarespace also comes with a short questionnaire for new users.
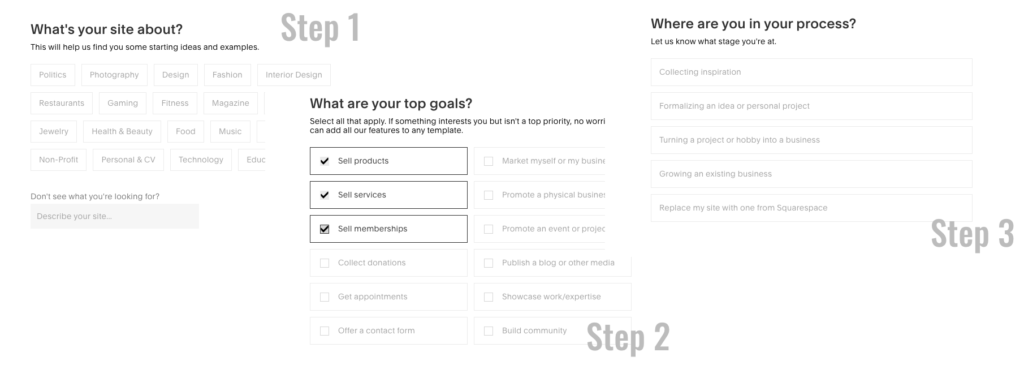
These simple questions help Squarespace understand its users and provide a better experience. As we’ve seen with Webflow, Squarespace also uses the answers provided in the questionnaire for template suggestions, feature suggestions, and so on.
So, take a few minutes and think about the goals of your new site? What is it meant for? Is it simply for promoting your brand, or do you want an online shop? Also, remember you don’t have to have one goal. Like many of its kind, Squarespace understands that a website is ticking more than just one box. And so should you.
2. Choose the right Squarespace template for your business
Now that you have established a purpose for your new Squarespace website, it’s time you give it an identity. But before you choose a template think of the goals we discussed above. Write them down on a piece of paper. Then, think about how you want to communicate with your users. For example, what tone should you use? Is it a professional tone or is it a friendly-casual tone?
Then think about your users, specifically, who are they? Who are you trying to reach, what do they like, what do you want them to see when they first reach your site?
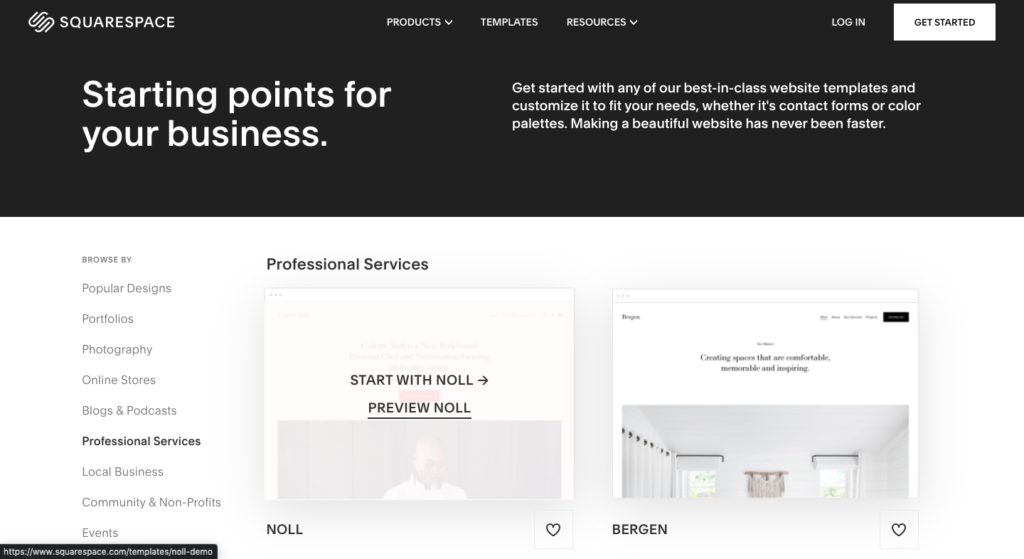
In short, before you choose a theme, gather as much data about your users as possible. The better you know them and understand their needs, the better your theme choice will be. But don’t worry if you are unsure of your choice, with Squarespace you can change your template at any point in time.
3. Design your Squarespace website
Once you selected a theme you are happy with, it’s time to get down to business. So the first step when you start a website with Squarespace is the structure.
3.1. Create a page
Depending on what purpose your website serves, as well as the template you selected, the basic structure of your platform will be different. For example, if you select a portfolio oriented theme, it will include pages like Architecture galleries or Work. But if you choose an online shop template, it will include different pages.
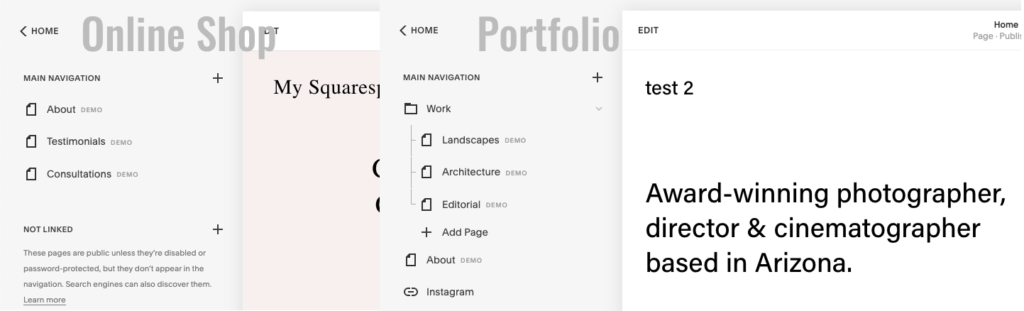
Nevertheless, these basic structures are there only for initial guidance. Your website will have a unique structure of its own. However, even creating something as simple as a page is easier in Squarespace. For starter, to create a new page, go to Pages and press the plus button next to Main Navigation or Add a page at the bottom of your site map.
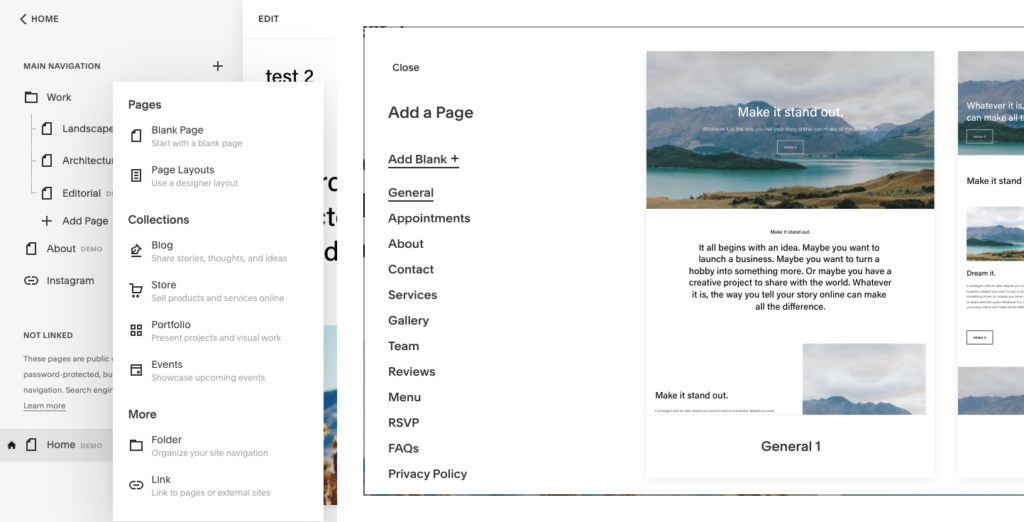
A drop-down menu will show, with several options. From here, you choose if you want a new blank page, a page from a template, or a page from a collection. Each of these options has its own purpose, for example, you can choose a blank page and create your own layout, or you can choose a designer-built layout. You can also choose to add a blog, a product page, or a portfolio.
3.2. Page management
Aside from having the right pages in your sitemap, you also have to manage them. This includes hierarchy, SEO, social images, and so on. Remember that every detail on your website is connected. For example, your URLs play an important role in your SEO, as well as how memorable you are for your user.
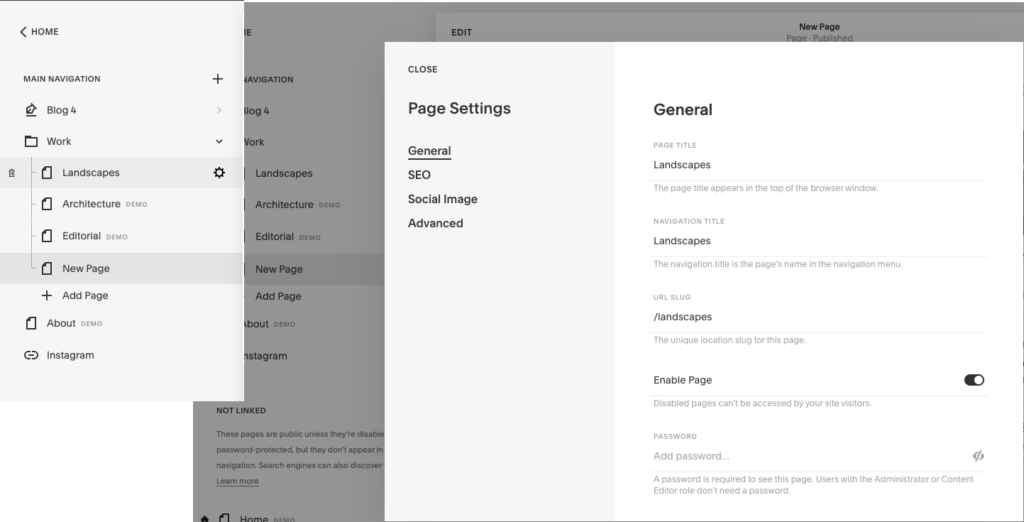
In the Squarespace website builder, you can easily control all of these aspects by going to Pages, hovering on the page you want to optimize, then click on the Settings button – the gear icon – on the right. A menu will show different optimization areas, and each comes with improvement guidelines.
Once you fixed your page SEO and other settings, you can order your site map by creating folders and dragging different pages within the folder, or simply sorting them according to importance. Basically, bring upwards the most important pages so your users find them faster.
3.3. General Design Settings
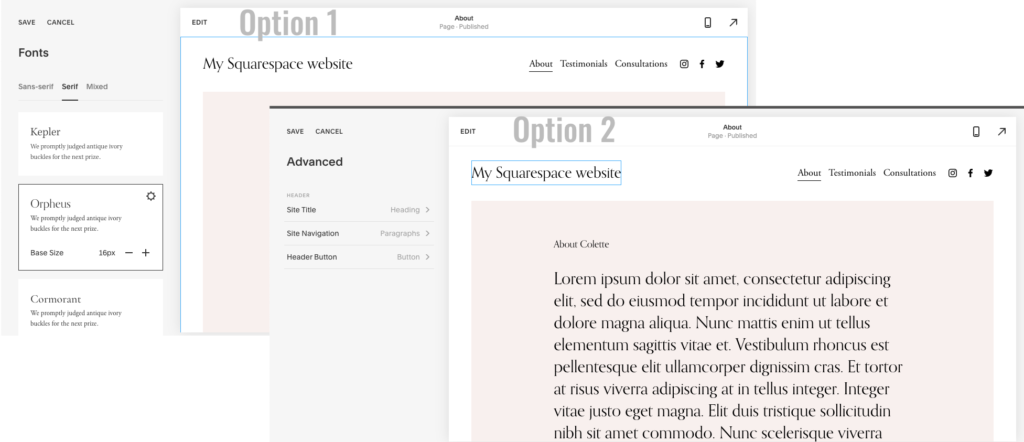
Applying your own style on your pre-built website adds a personal touch your users will expect from you. so, starting with fonts, you can add your own twist to the website. So, go on Design and click on Fonts. Here you have two options. Either change the font settings for the entire site or select one element and change the settings for it, specifically.
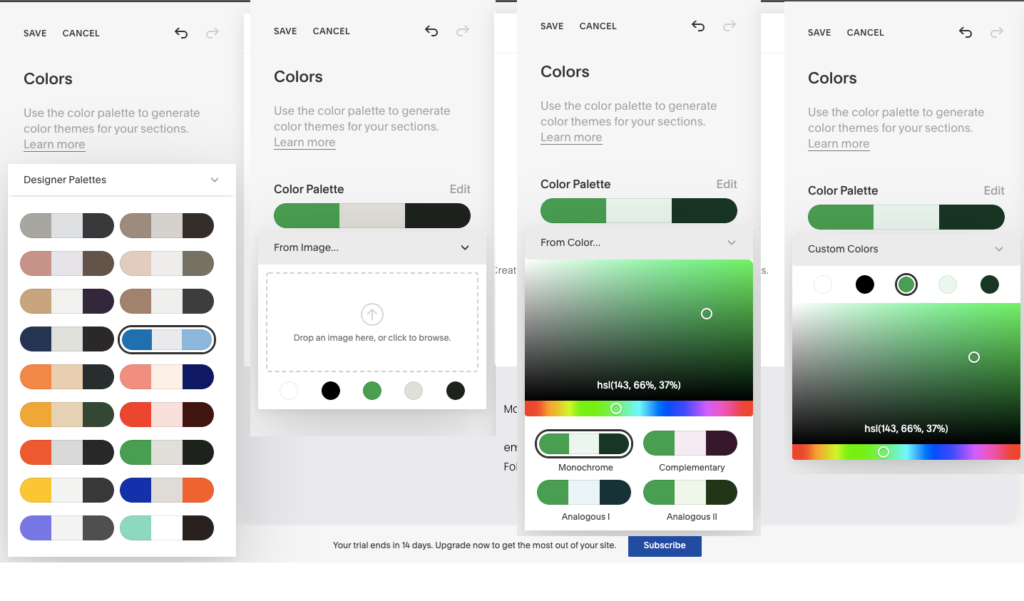
Changing colors on your Squarespace website is just as easy. From the same Design menu, select colors, and then click on Color Palettes. There you have the option of choosing a pre-defined color palette, or go for more advanced settings, like creating your own palette, or choosing the color from an image.
However, as we mentioned above, your design should fit your brand in both fonts and colors. So, the Squarespace website builder also comes with themes. The themes are a combination of colors and fonts that you assign to each section, based on your brand’s identity. Scroll through the list and find the ones closest to your liking. To assign a theme to a section, click on the pencil icon, and mark the destination. You can also change the individual color from there as well.
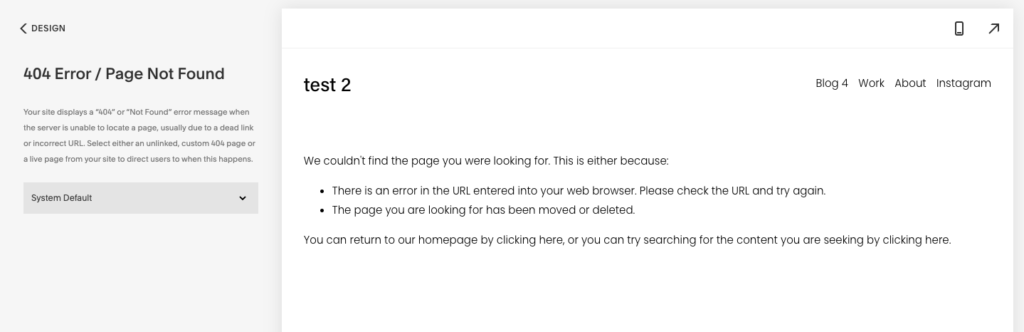
3.4. Other Design Elements
Also from the Design panel, you can personalize specific pages like the checkout page for eCommerce or the 404 looks for the not found page. These pages might seem unimportant, but in reality, they are extremely influential. A nice checkout page will complete your user’s shopping experience. At the same time, a memorable 404 page will put a smile on their faces and make them appreciate your efforts.
However, within this panel, you can also add your own favicon – the little icon on the browser tab – as well as your own social media icons. The more personalized your Squarespace website elements, the better.
3.5. Add a blog
Content writing is a powerful tool. It creates trust with your users, it promotes user loyalty and it boosts your search engine ranking. So, should you have a blog? Yes, yes you should. And starting a blog with Squarespace website builder is easy.
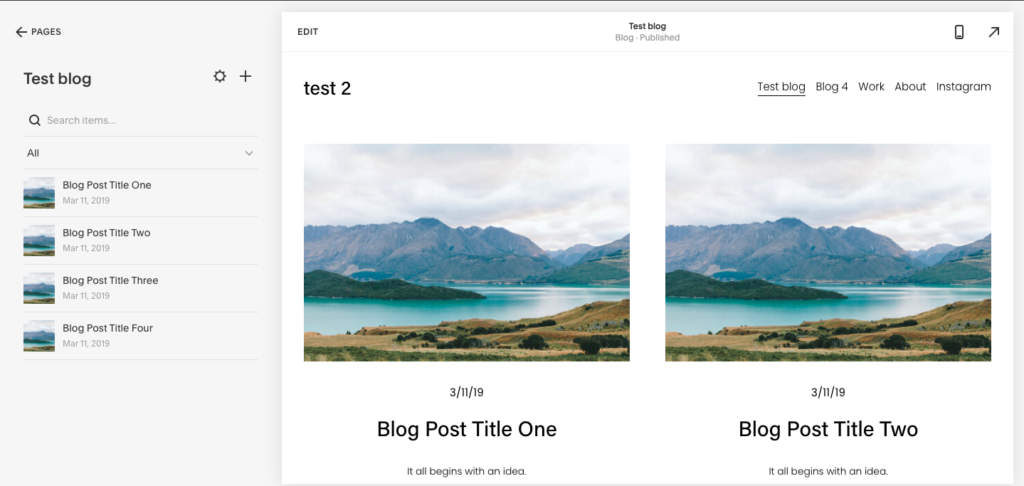
First, go back to your site management. There, clock on Add a new page, and from Collections, select Blog. This will trigger a popup asking you to choose a layout. Once you made your choice, the Blog section will be added to your site map. You can arrange it in the order you like, or start editing an article. To edit or create a new blog, click on the blog section and select one of the dummy articles or press the plus button.
This will send you into a new section, the post section, from where you simply create your content. Simple, right?
4. Marketing with Squarespace
Squarespace is all about promoting you, your business, and your brand. For this, the Squarespace website builder comes with its own inbuilt marketing and promotional tools. One of the tools helps you create and manage email campaigns.
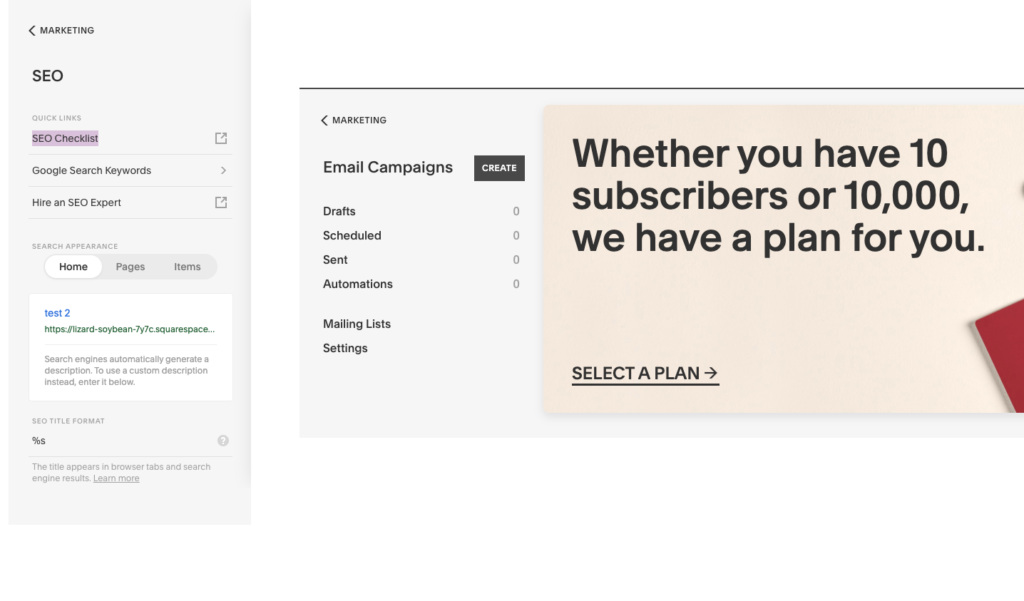
Like all of the tools within the Squarespace website builder, this comes with step-by-step setup guides as well as statistics and analytics tools. However, marketing is not all about campaigns. which is why Squarespace comes with SEO and Location Management setups. Here, Squarespace provides an SEO checklist, the option of connecting with Google’s Keywords finder, as well s hiring an SEO expert.
5. Add eCommerce to your Squarespace site
Adding an eCommerce module on your site is only recommended if you are actually selling products or services. So, if your site’s goal is purely promotional, you should skip this step for now. But, if you do plan on starting an online store, Squarespace is the right choice.
First things first, let’s get your Squarespace website ready for eCommerce. Go on the main page of the dashboard and click on Commerce. You will see a Get Started screen, with instructions on your next steps. This screen, like the one at the beginning of this guide, will take you through a series of questions that help Squarespace set up your store.
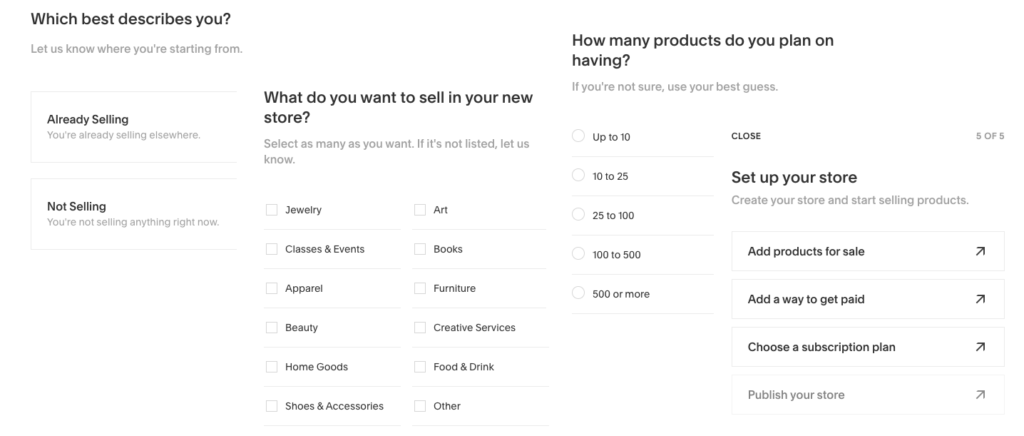
Then, go to Pages, Add New, and click on Commerce. Like with the blog, you have to pick a layout. Once you find one you like, click on it and let Squarespace set it up for you. To edit a product, go to your new store page and either add a new item or edit one of the dummy products there. Don’t forget to save after every change.
Now, go back to Commerce and finish setting up your eCommerce module. You will have to set up the payment and shipment methods, subscription plans – if you have them – and so on.
6. Manage your website with Squarespace Analytics
The analytics module shows you important data regarding your site and eCommerce module. This includes sales, conversion rates, revenue, etc. You also see traffic statistics, user geolocation data, and more.
All of this data will help you improve your website and online shop once you go live. Use the information gathered to better advertise your products, improve your keywords list, better user targeting, and overall managing your site.
7. Choose a plan and upgrade your Squarespace subscription
Now that your website and online shop are all set up, you will want to go live, as they say. This means making your new Squarespace website open to the public and “crawlable” by search engines. However, since Squarespace is not a free service, you can’t publish your site until you have chosen a subscription plan.
So, to upgrade your Squarespace plan, go back to your Squarespace management page. Here you will see all of your projects, and an option to subscribe. If you click on Subscribe you will be redirected to Squarespace’s plans page, from where you can now choose the one suited for you. It’s recommended that in the beginning, you chose the most basic plan that suits your needs so you keep your costs down. Later on, you can upgrade your plan as your site grows.
8. Choose a domain for your new Squarespace website
Once you upgraded your account to premium, you have the option of choosing to add your own domain or buy a domain through Squarespace. So, if you don’t have a domain already, go to your Squarespace management page and click on Domains.
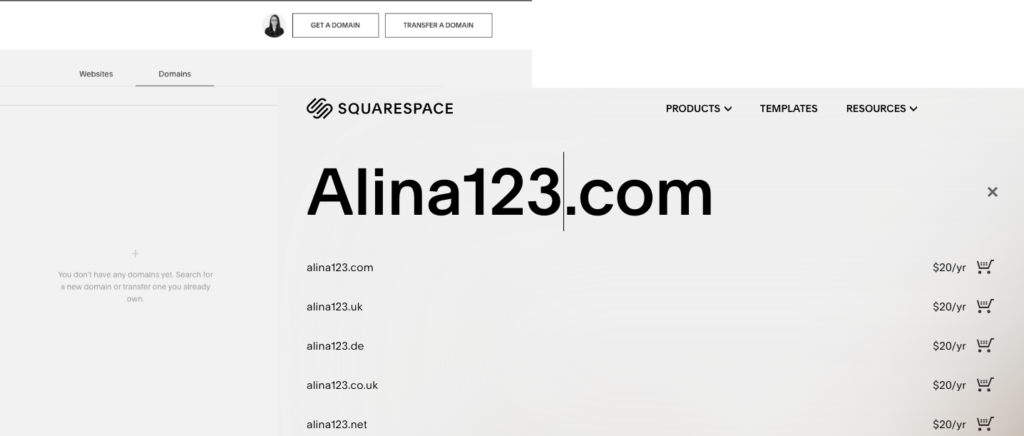
To add a new domain, simply click anywhere in the middle of the page, and you will be redirected to Squarespace’s domain market page. Type in your preferred domain name, and see if it’s free. Chances are you will have to do this a few times since there are literally millions of other websites out there but keep at it. You’ll find your domain eventually.
9. Publish your Squarespace site
You have your beautiful design, you have your online shop. Now you also have a domain locked and loaded, so the only thing left is publishing the site. From the Squarespace management page, select the site you want to publish and go into edit mode. Once in the Squarespace website builder, go to settings and click on Site Availability. Here you have three options, and the currently selected one should be Private.
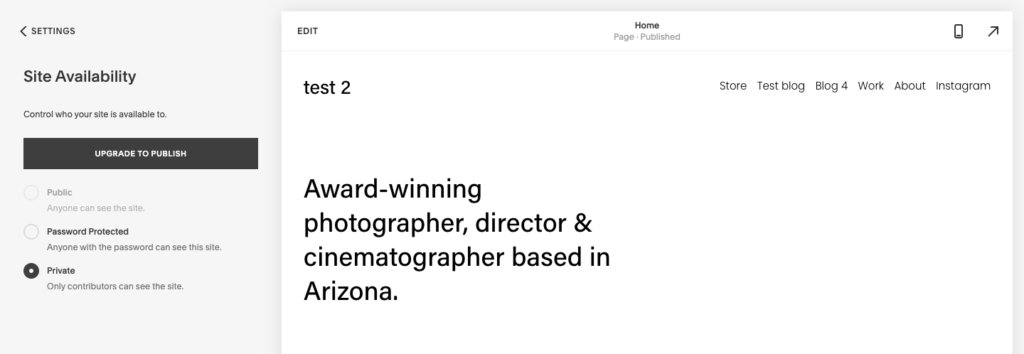
This means that only you and your contributors can see the site. If you plan on releasing the site only for a limited group of test users, choose Password Protected. This will make the site public for external users who only see if they have the password. This also stops search engines from indexing your site before its ready.
Once you finalized your testing phase and you are ready to publish your site to the entire world, go back to Settings and change your status as Public. This will remove the password and allow both users and crawlers access on your new platform. Congratulations, your new Squarespace website is now live.
Good luck, and remember, your site is like a plant. The more you care for it, the better it will do over time.
Comments are closed.