
Adding Google ads on a website is the primary way to monetize your blog. so Here is a method of how to add Google AdSense to WordPress post and over the whole site. show google ads on your site and make money.
- how to add google adsense to wordpress
- how to put google ads
- how to put ads on my website and get paid
- add google ads to website
- how to add adsense code in wordpress post
- how to add google ads in website
- how to monetize wordpress blog with google adsense
- add adsense ads to wordpress
- how to show adsense ads on wordpress
Google AdSense Ads are the best option for monetizing your website or WordPress blog easily and show visitors money-making ads.
Introduction
there are many ways to monetize a blog or website but Google Adsense is one of the most popular ways to monetize.
AdSense is probably the most popular service for this. It can be used to display text, video or image advertisements. As a website owner, you will be paid each time your visitors click on ads.
What is Google Adsense
Google Adsense is an advertising company powered by Google.The best part about AdSense is the fact that it is one of the easiest and one of the best monetization options for website owners today.
Which can help them earn thousands if done right. Publishers simply need to embed a small JavaScript code into their website(s). And that’s it!
Add Google Adsense Ads to WordPress
Below are steps to add Google Ads to your WordPress blog.
1. SignUp for Google AdSense Account
The first thing that you need to show Ads on your Blog
- An approved Google AdSense Account
So to get this account signup on Google Adsense with your google account it will take a few minutes and the signup process is very easy.
However, it can take up to 2-3 days for Google to check and approve your application.
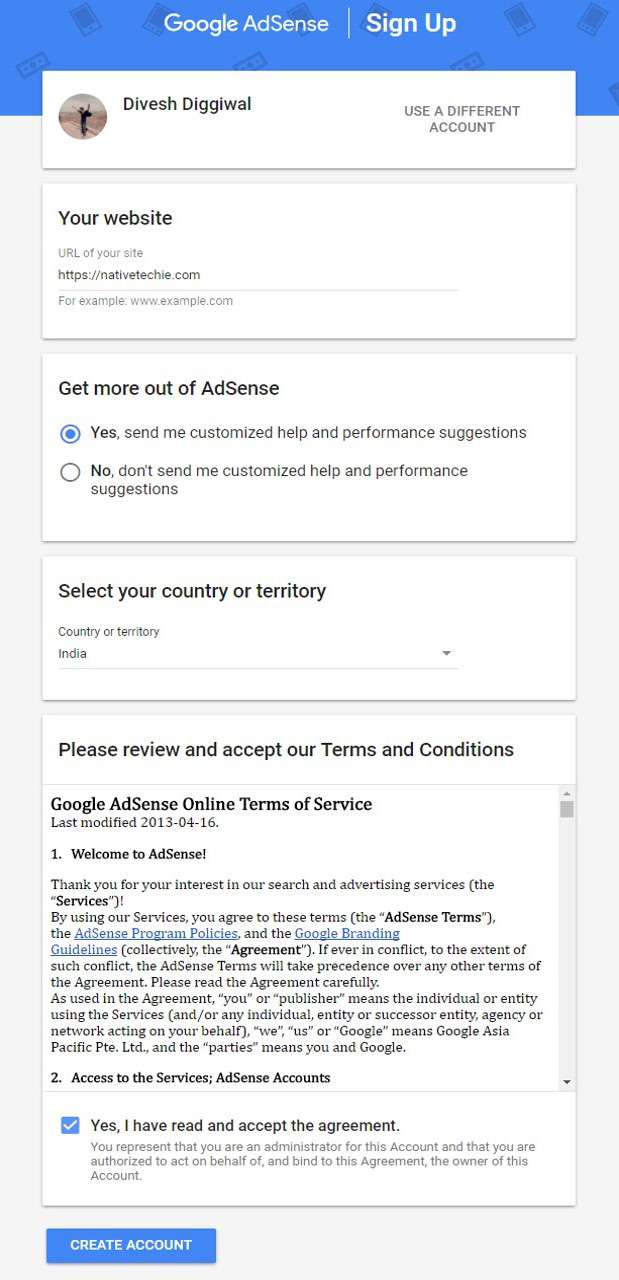
This image is a screenshot of Google Adsense sign up page, you have to enter your some details and then one of Google employee check your application and site if they found it right to their policies your google account will get confirmed.
Tricks to get verify Google Adsense Account
- Use your own unique data
- Create about, contact and disclosure pages
2. Connect your Site to Adsense
Ok so now you’ve signed up for Google Adsense account but to verify this you’ve to connect this account to your WordPress blog.
For this Google, AdSense will provide you with a script code and you’ve to put this code in your heading tags. the whole process I’ve described below.
Before you start
<head> and </head>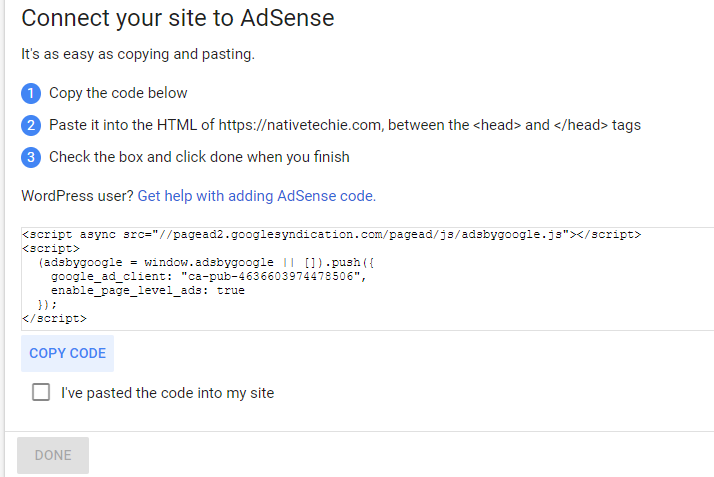
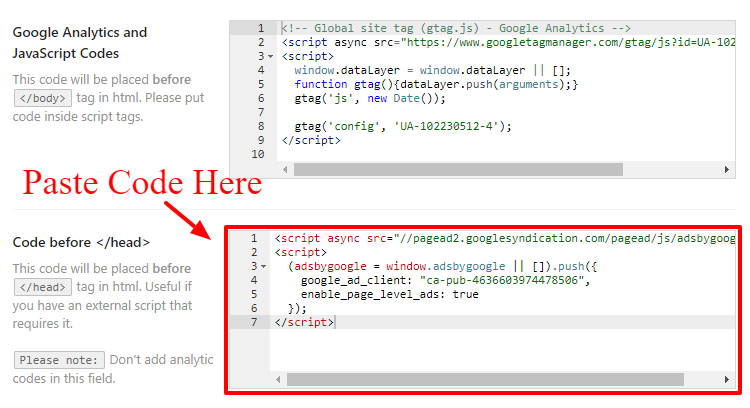
2.1 Place Through WordPress Theme :
Now mostly themes are also providing these features where you can put your google adsense codes and your theme will add them into head section.
So first check in your theme option/setting if you found somewhere a box which is addicontentnet between heading tags(<head>….</head>), Put your Google Adsense code there.
Here I am using publisher theme and it is easy to add google adsense codes to head section through theme options.
![]()
Read More: Why I choose publisher theme
the next method to add Google Adsense to WordPress is using a plugin.
2.2 Place Through WordPress Plugin
By using any plugin you can easily add this code into header. here is some of the wordpress plugin you can choose anyone.
Be cool! This verification usually takes up to 3 days, but in some cases, it can take a bit longer.
After successfully verified now you can make new ads and place these ads on your site.
3. Get Google Ads Codes
Once your account is approved, you can start creating Ads.
Sign in to Adsense account and select My Ads
4. Select Ad Unit
For creating new Adsense ads there is necessary to create a new ad unit. this section contains all the list of ads that you have already created the ted in ad unit.
click on ” + New ad unit “.
5. Select an Ad Type
Google Adsense provides three type of Ads that you can display in your website at different places with their different purpose.
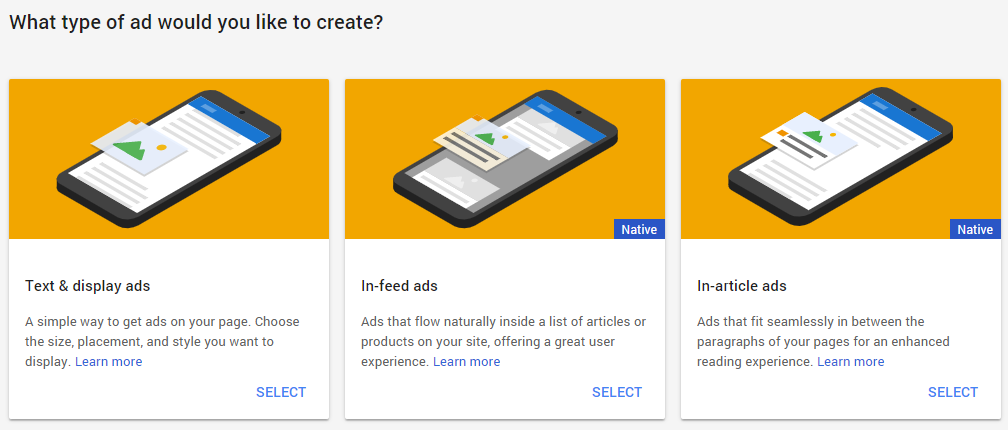
5.1 Text and Display Ads
Text And Display Ads are the common Ads that is mostly website uses. it is a simple way to ads on your page. it allows choosing size placement, colours, and style that you want to display.for creating this type of Ad filled required details in the forms and customize according to you.
For creating this type of Ads select this Ad type and fill required details on the form, here customize option is also available for choosing a colour or size. I recommended choosing responsive size than ads will automatically take size where you placed them.

Where to use :
- Inside Article
- At Sidebar
- After Article
- At Promo bar
5.2 In-feed Ads
In-feeds Ads have flowed naturally inside a list of articles or products on your site.
In-feed Ads have 4 type of style to show Ads on your list. Select an Ad style and customize it according to you
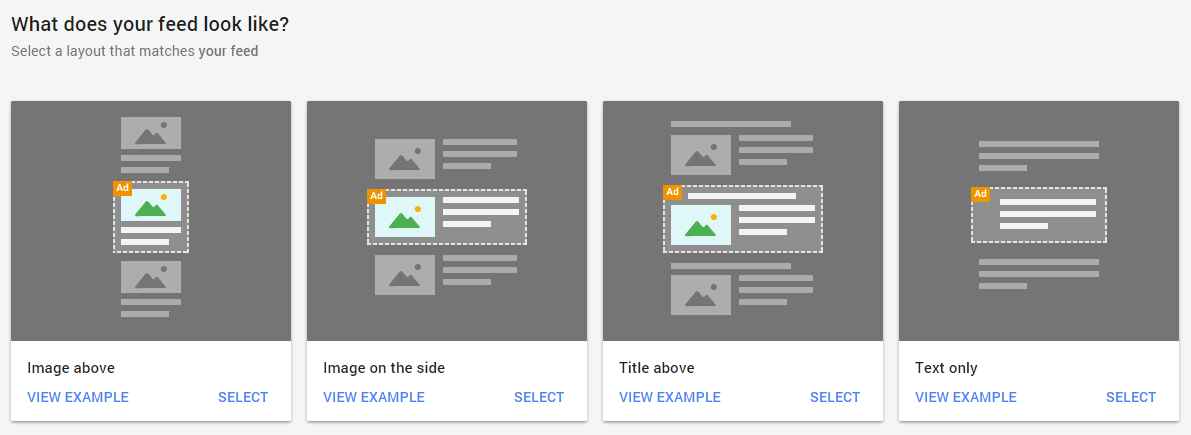
Where to use :
- Post List
Info! Publisher Theme has the great option for Article List.
5.3 In-article Ads
this type of Ads is fir easily inside an article post between the paragraphs of pages.
In-article ads are the best option to show ads inside a post i am also using this method for showing ads in my website.
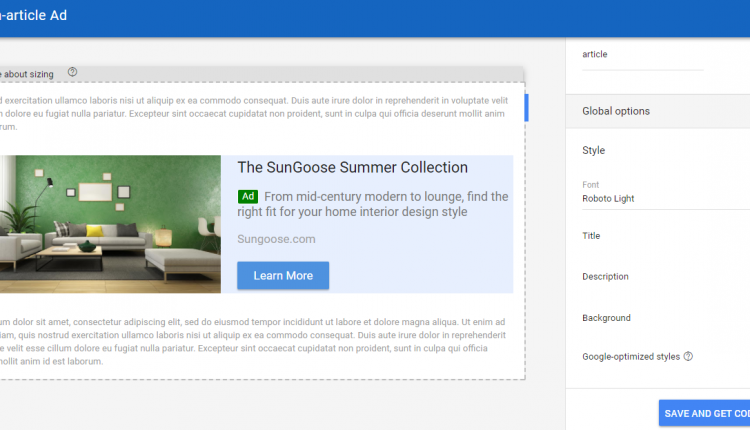
Where to use :
- Inside Article
- After Article
- At Promo box
Well done! After Creating an Ad type Copy the Codes.
6. Show Google Ads to WordPress
After successfully copy codes time to add these codes to your website.
these codes are in script formate.
there are 2 options for adding ads to your site
- 6.1 Using a Plugin
- 6.2 Using a Text Widget
6.1 Using a Plugin
By using a WordPress plugin Ads can be placed on the WordPress website at various location. here two types of the plugin that is a great option for showing Ads on the website.
Using Better Ads Plugin
Better Ads is a premium plugin that comes with publisher theme( WordPress best newspaper theme ! i am also using this ). For adding ads in better Ads select
- Go to Better Ads >> Banners
- Click on Add New Banner
- Enter Ads title, Select Ad type, Insert your codes, Select in which device you wanna display.
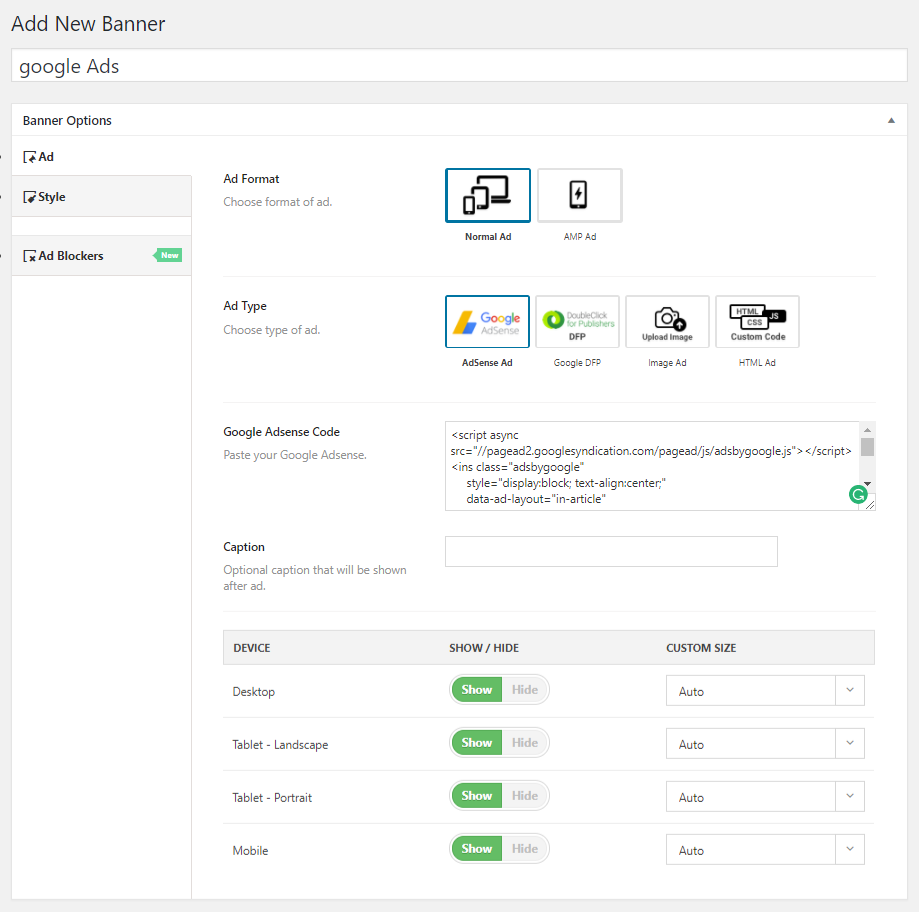
Good News! Publisher theme also comes with Adblocker fallback option.
Using Ad Inserter Plugin
This plugin is very common among WordPress users and easy to use to monetize WordPress with google Adsense.
It has free and premium version both but in beginning, you can easily install its free version and insert your google ads into WordPress blog or site.

Ad Inserter is a powerful plugin that would help you with inserting AdSense ads on your WordPress website. by using this plugin ads can be placed up to 16 location in the website and it will automatically display ads in responsive formate.
- Easy to display ads in various locations
- Comes with an automatic display option that allows the plugin to automatically choose locations
- 16 code blocks
6.2 Using a Text Widget
Another way to add Ad insert into WordPress is by using a new widget. the advantage of this method is you don’t need to install new plugins
Follow the steps below in order to create a new widget and insert the Adsense code:
- Log in to your WordPress dashboard, navigate to Appearance -> Widgets section.
- To add a new widget, select Text and drag and drop it to the place where you want to display the ads. In this example, we decided to put Adsense to Sidebar, but you can choose any part of your website. Press the Add Widget button.
- Fill the Title and Content fields.
- Title – Enter the name of your widget (you can leave it empty).
- Content – Paste the copied code from Google Adsense website.
- Once you are done press the Save button.
Here’s What you Read Next
- SEO Friendly Post: 12 Tricks to make WordPress Post SEO Ultimate
- Get Instagram Followers: 12 Exclusive Way 3x your followers
- 7 Rich Snippets Plugins to Add Schema Structured Data into Site and Improve Page Rank
Let’s Gossip
Let’s gossip with web friends, and share what is your story to placed Google Adsense on the website, which type of plugins are you used and what is your experience on Google Adsense.
Comments are closed.