
One of the most important parts of building your websites is making sure they load fast. It’s not a surprise – these days web page loading speed is an important factor for search engine rankings.
There are many ways to speed up WordPress websites, for example, using a caching plugin, optimizing images or using a Content Delivery Network (CDN) like Cloudflare. The best results can be achieved using all these methods in conjunction.
In this tutorial, you will learn to setup Cloudflare for your WordPress blog and configure WordPress Cloudflare plugin.
[toc]
About Cloudflare CDN
Cloudflare is a content delivery network which acts as a proxy between the website and visitor. It serves cached static content from the nearest location (CloudFlare has multiple servers around the globe), thus making website loading speed faster.
Moreover, CloudFlare handles all requests to a website and can offer more useful services compared to traditional CDN:
- DDoS attack mitigation
- Analytics on all requests made to a website
- Easy SSL certificate installation
- Network gateway between protocols
How to Add Cloudflare WordPress Plugin & Set it
Here is step by step guide to add Cloudflare CDN to your WordPress site and then install its plugin yon your site so you can easily manage all CDN function from your WordPress dashboard.
Let’s start the tutorial of adding Cloudflare CDN to WordPress.
Step 1 — Create a Cloudflare Account
Navigate to official Cloudflare website and click Sign Up button in order to create an account on Cloudflare. Fill all the required details and create an account.

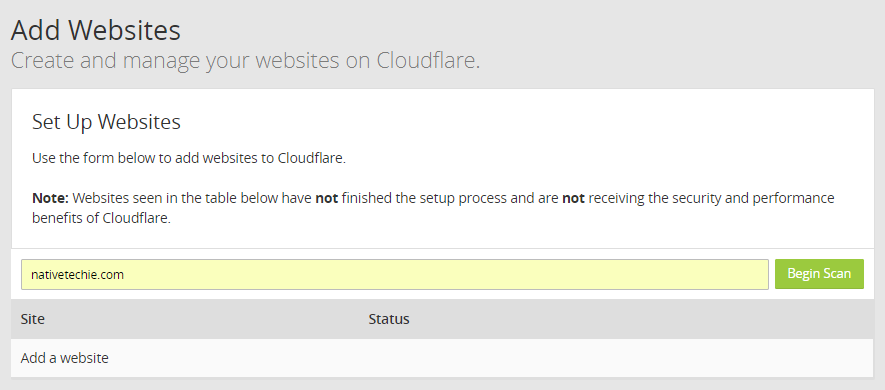
Step 2 — Add New Domain
After you have signed up with Cloudflare, you will be prompted to add your website window. Enter your website domain name and click on Scan DNS Records button in order to proceed.
Step 3 — Check your Current DNS
After the scan has been finished, you will be prompted with your domain name DNS details. In this step, you can enable or disable Cloudflare for specific subdomains.
Orange Cloud enables the Cloudflare and Grey Cloud disables the Cloudflare for a specific DNS record.

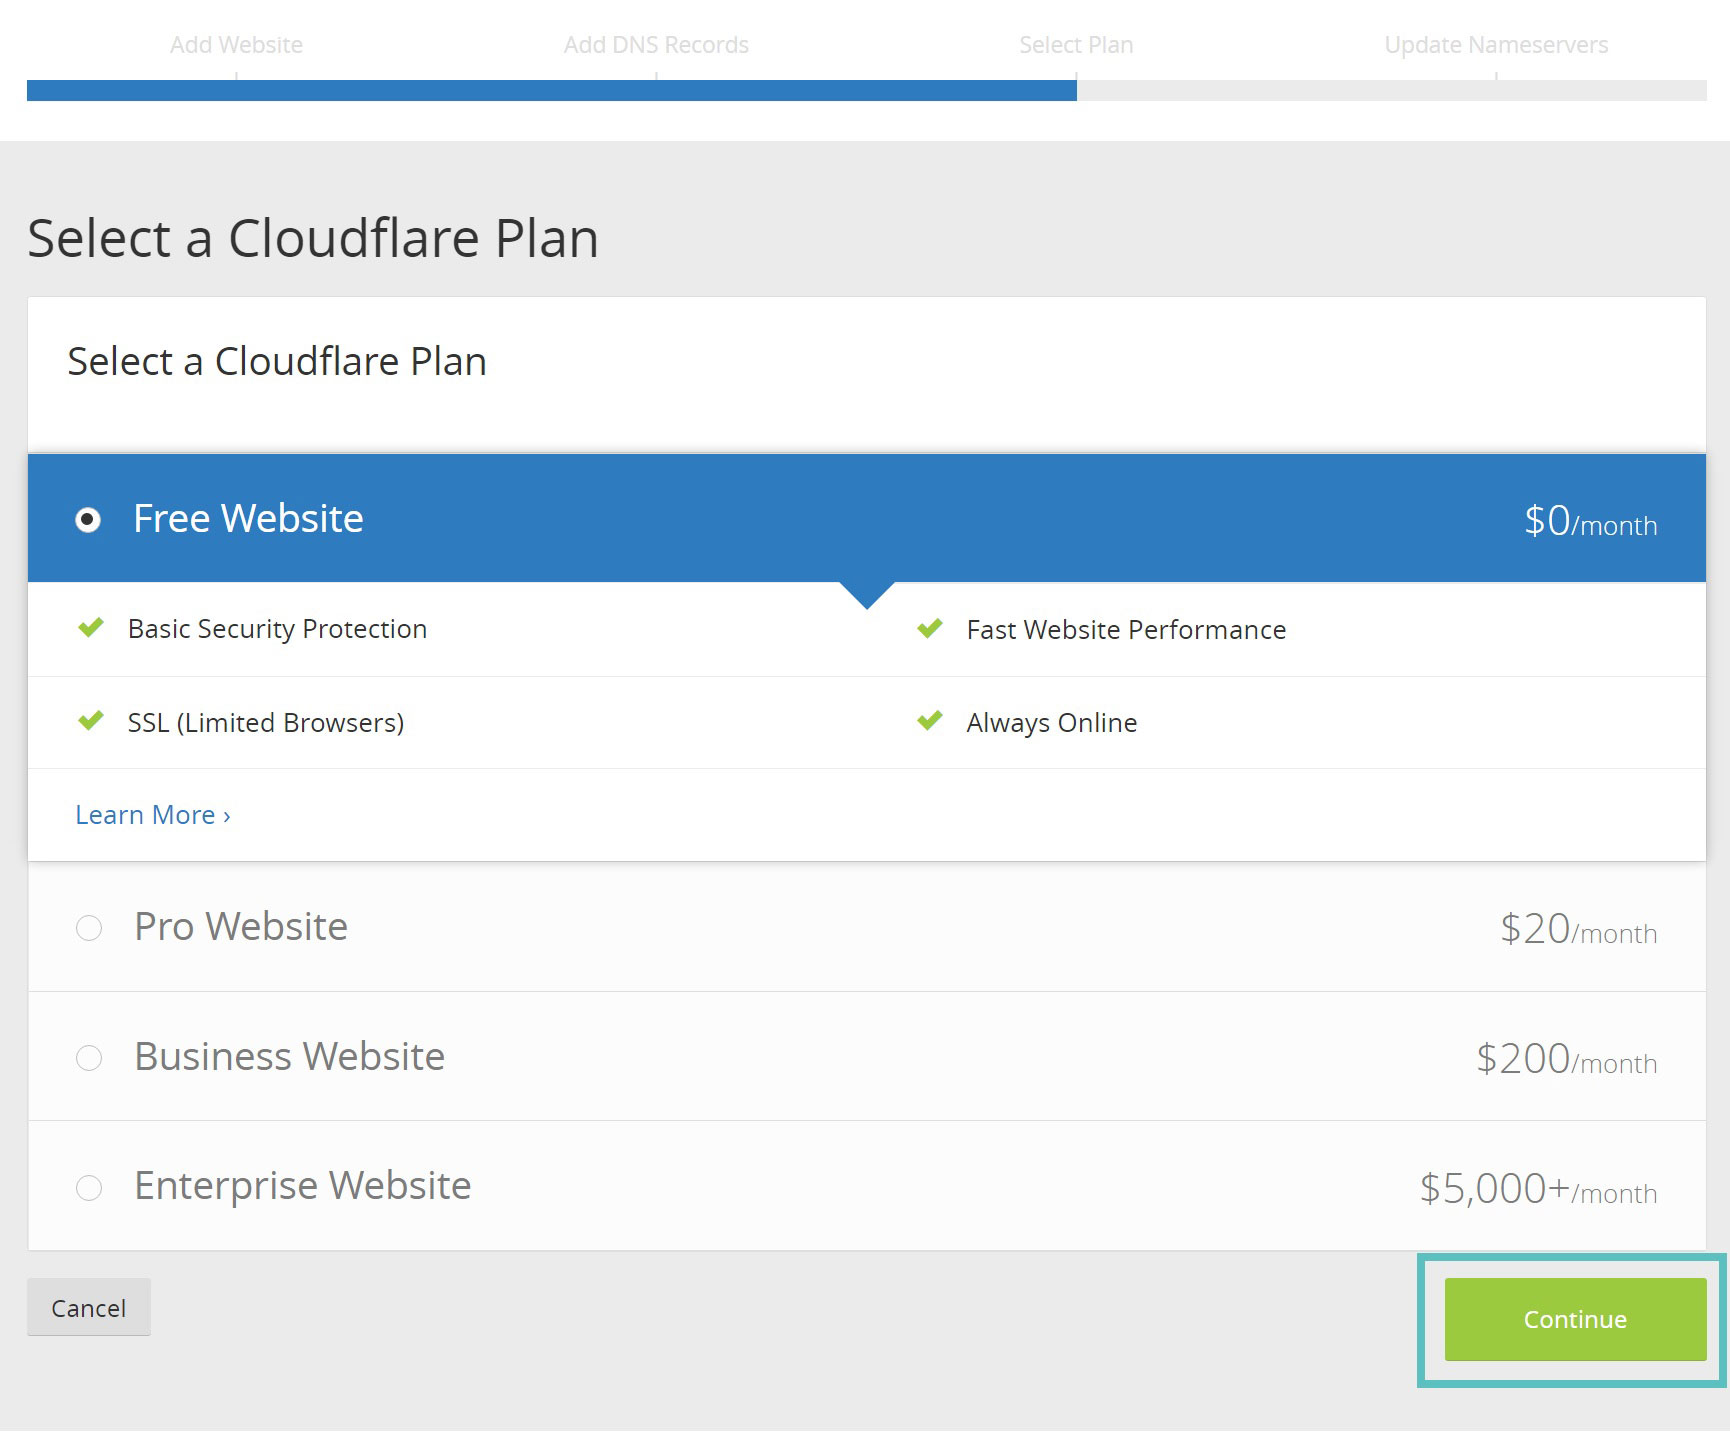
Step 4 : Select A Cloudflare Plan
On the next page you will need to select a Cloudflare plan. We recommend starting with the free plan, which works for most users. Then click “Continue.” You can read more about the differences in Cloudflare’s plans.
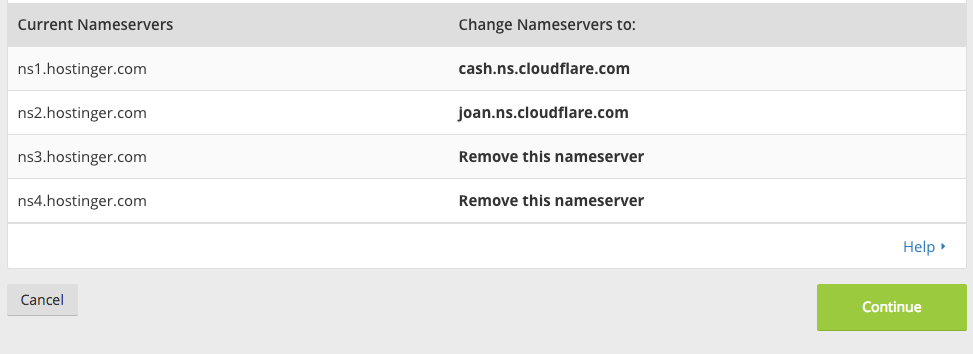
Step 5 : Change Domain NameServer
You will then need to change the nameservers on your domain to point to Cloudflare (use the ones they provide).
Because Cloudflare is a full proxy service, basically how it works is you point your domain to Cloudflare, and Cloudflare then points your domain to hosting provider.
There is no downtime when you switch your nameservers. Here are a couple links to documentation with different domain registrars on how to change them.
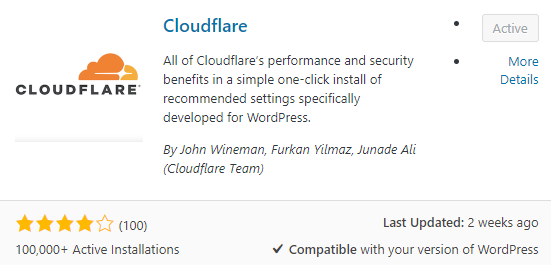
Step 5 – Install Cloudflare Plugin
Login to your WordPress admin area and install the CloudFlare WordPress plugin.
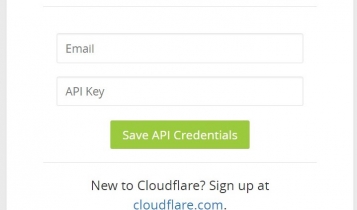
Install the plugin and Activate it. after successful activation go to Plugin Setting in the setting there is option for enter Cloudflare credentials that is email and API key. For getting API key again go to Cloudflare site and take API key from there in next step.
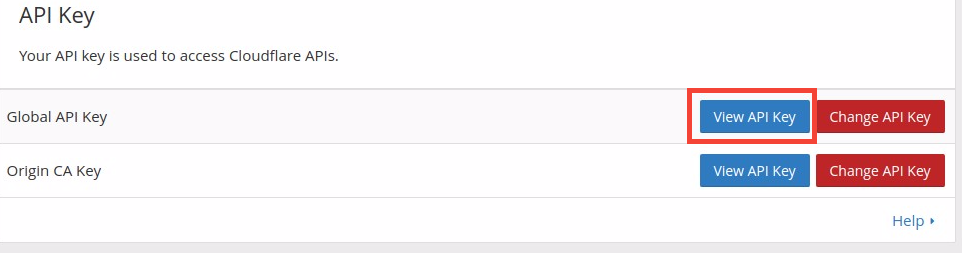
Step: 6 Get Cloudflare API
Visit to Cloudflare site and go to dashboard section there is option for get API click on it and then you will see two types of API here Global or Origin API. Select Global API and view its API key copy this key.
After copy API go to WordPress Cloudflare plugin and enter email and API key and click on Save API Credentials. after success full this step time to configure Cloudflare plugin.
Step: 7 Configure Cloudflare WP Plugin
When transferred to your Cloudflare settings page, click on Apply button under Apply Default Settings section. You can use default Cloudflare settings for WordPress websites.

It’s highly recommended to enable Automatic Cache by clicking on Apply button in Automatic Cache section. Enabling Automatic Cache purge will clear the entire Cloudflare cache when your website design is updated.

Conclusion
Congratulations, you have learned to activate Cloudflare for your blog and configure CloudFlare WordPress plugin. This is a great way to speed up your website and protect it against DDoS attacks.
thank you, this is the best content and helped me to implement my worpdress website on CloudFlare. Easy to understand step by step for beginners